
 So, it has not been a good week ... china wise :( Sometime ago I gently smacked the sugar bowl to my good china
 . I didn't even notice it at first - then a small crack appeared. The crack has been growing ever since, and last week it exploded!!! WHAAAAA! Then, just to end my week, a tea plate to my every day china snapped - I mean just snapped in half as I was taking it out of the dishwasher. Geeeesss!
Ok, to make up for all that bad luck the mater, after cleaning dresser

 drawers (aka downsizing) donated a box (eat yer heart out girls) of hankies! Yup dainty hankies. Not sure what I'll be doing with them ... but at some point something creative will cross my mind. Speaking of creative .... here's block nine of my Tisket-Tasket block challenge. I enjoyed doing this one, I think the Scottie dog is kinda cute!
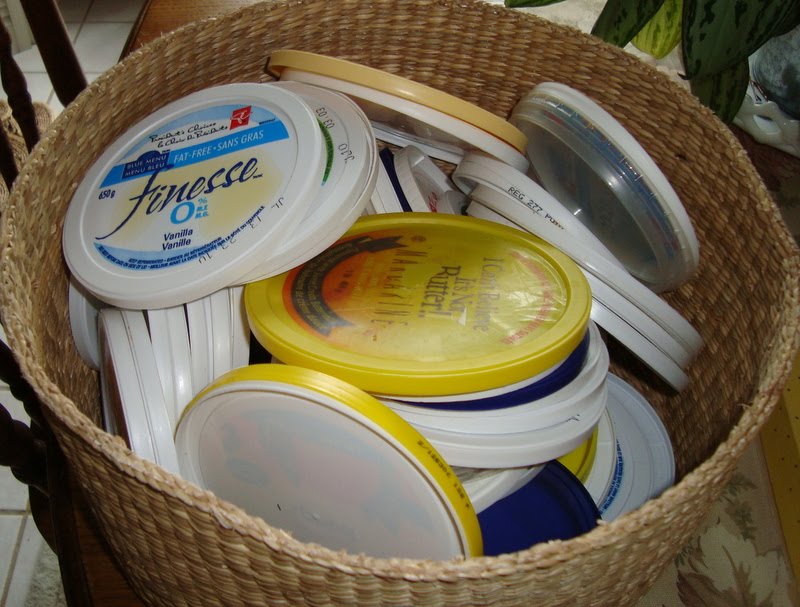

I've been doing a fair bit of blog su
 rfing lately and have truly enjoyed several great tutorials out there. I have decided that it's time to take a stab at my own, so - for all you out there who like handmade, enjoy being GREEN, and appreciate tutorials .... here's my first! Just about all of us purchase either margarine or yogurt which leave us with loads of plastic containers and lids. Save the lids!
 Make yourself a paper elongated egg shaped pattern about 3" to 3.5" long. With a marker trace the outline of this pattern onto recycled plastic lids. Cut out three with "utility" scissors. Next, trace your pattern onto your fabric, six times!
 Cut out your fabric, leaving a scant 1/4" seam allowance. Take two
 fabric pieces and pin match the points, right sides together. Starting about 1/4 " from the bottom right hand corner hand sew up to the corner, around the far side and around the top to the left corner then about 1/4 " along the bottom left, following the marked lines. I use a back stitch as you want this seam to really hold.
 Now, turn your piece inside out making sure you have ni
 ce neat corners. Insert one of your plastic pieces ... trim to fit if necessary, accuracy is not necessary and is the beauty of this little project! I use a ladder stitch at this point to close the fabric around the plastic. the smaller the stitch the better.
You should now have a fabric covered plastic pattern piece. Make two more exactl
 y the same.
 Hold two of your pieces together and whip stitch them together. Once this is done grab the third piece and whipstitch it to one side of the pair - doesn't matter which side. Now it's time to decide if you want to add some beads, ribbon or some kind of tag/handle.
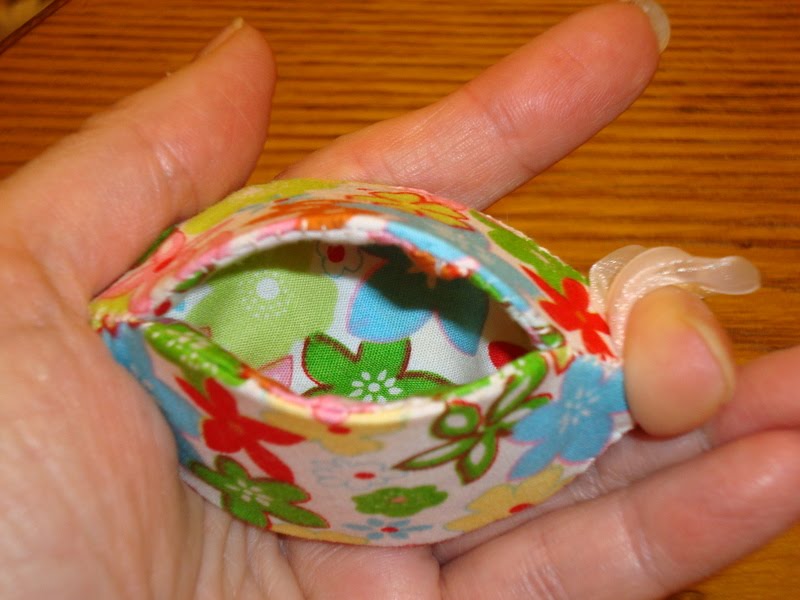 Here's where you get to be creative and come up wit
 h something unique! I've used ribbon and beads.
To complete your thimble holder sew closed about 1/4" at both ends. you will find the "thimble" holder closes and stays closed better if you do not skip this last step! I'm putting "thimble" in quotes - just because I use it to hold my thimbles doesn't mean everyone has to use it the same way. Mon mater uses her's to keep her rings in when she's away from home and takes them off . A friend uses her's to keep her pills in ... lots of ways these little containers can be used! I made up half a dozen or so for my guild for their quilt show. We have a "toonie" table - wee gift items which visitors can purchase, and the proceeds go to the guild and help finance our charity work during the year. Here are my completed thimble holders!

TTFN

53 comments:
Oh yes I can think of many uses for these........I am definitely going to make some
Great tutorial, Thanks!!!!
Rather nice site you've got here. Thanx for it. I like such themes and anything connected to them. I would like to read a bit more soon.
Julia Benedict
I just love these. Can't wait to try them out, thanks!
What a wonderful idea. Thank you for the tutorial.
What a great idea! I am going to go make some right now! Thanks!
Linda
I enjoyed this tutorial and found it from The Quilt Rat.
Thank you for posting this! I saw these in the gift shop at the Rubin Museum, NYC and was thinking I could make them myself...and then forgot all about it. I had no idea what was inside the pieces. I was thinking it was cardboard but the plastic makes more sense.
In the directions, it says "Make 3 more exactly the same." Wouldn't it be make 2 more?
excellent, I am looking in my recycle bin NOW! I have a shoebox full of scraps to use up and this is just the ticket Thanks!
Thanks for putting the directions for the thimble holder. I am making a bunch.
Thank you for a wonderful tutorial! I am interested in making some of these and this is really helpful.
Would you mind if I post a link to this tute in a Flickr group? I am running a mug rug swap for some people over there and would like to get some of them interested in the pipkins, too. No problem if you don't want me to, but I'd appreciate knowing if it would be OK or not. Thank you so much.
Susan/FlossieBlossoms
thanks for allowing Susan to post your link to flickr, I think you will have many happy followers with this tutorial. Thanks again
these are so cute! thank you for the tute. i cant wait to make one. i did a blog post about them, and i linked back to here....i hope its ok! let me know if not
http://iamchickenfoot.blogspot.com/2010/10/kai-no-kuchi.html
Hi! I have found this lovely tutorial through Susan or imchickenfoot's site! Thank you. I have never seen anything like this and am anxious to make some myself! Thank you so much!
thank you for sharing this tut, yesterday I made my thimble holder, only I didn't use it for a thimble - I hid a present-banknote in it :o)
i am going to try it out.
Lovely and useful holder tute! Thanks a lot!
Lovely and amazingly creative! Thanks for sharing this wonderful idea.
These are really great! Will definitely be trying some out very very shortly. Thank you for posting the tutorial!
Hi, found this tute through ZAKKA LIFE, love it!
Recycle plus scraps...great combo.
I love this to organize odds and ends! Also a great gift idea. Plus it's recyled! Thanks for sharing the tutorial. Visiting from the zakka life blog.
-caroline @ c.w.frosting
What a cute little idea!
We have the same fine china pattern. It's sad that your little sugar bowl is broken :(
What a great idea and a great tutorial. Thank you.
Thank you for this great tutorial!
Lovely greetings from Germany
Susanne
muchísimas gracias :D thank you so much <3
Wonderful tutorial thanks so much for sharing. I have seen these also and wonder how they were made. I will try my hand at it maybe today and will let you know so you can take a peek and see how your tutorial has helped other people. thanks again.
Great tutotorial, thank you! How about making some mosaic creations from the china porcelan?
Thanks for sharing your ideas...I have linked to you Freebies For Crafters...hugs Khris
How clever!!
Stopping y from Craft Gossip. Love this idea! Brilliant. Thanks for sharing.
Stopping y from Craft Gossip. Love this idea! Brilliant. Thanks for sharing.
I love these, they will make great stocking stuffers.
What a great idea for a nice nifty hostess gift!
Can I ask you where you got the template for the scottie dog? Trying to find one small enough to hang in the tree (cut several out in tartan fabric)
Thanks!
Thank you for your great tute! I do not like hand stitching but I will give it a try! I just love these cuties!
Those are adorable and so handy to use! I think I will have to make me one. Thanks so much for sharing!
Carolyn
A friend of mine made a quilt with her elderly aunts hankies. I think she just cut off the corner (triangle) that was embrodiered or had a lace edge, must have put a larger triangle of plain fabric underneath (they were fairly sheer) and then added a triangle of multicoloured floral to make half square triangle blocks (5" ish?) and sashed between, it looked great and was a lovely tribute. Bad luck about the china, happy quilting Sue SA.
Here via zakka life, and very impressed. So cute and functional!
This is such a fun idea! I would love to feature this on Reduce, Reuse, Upcycle. Your feature will go live on Wed. (11-30). Feel free to stop by and grab a featured button. Thanks!
that is so cool. Adding that to my list of things to do!
I know this is an old post, but I just came across it and LOVE it....I am going to try to squeeze some of these in before Christmas.
What a clever idea; thanks for sharing.
I had never thought of making them smaller to use as thimble holders. I have a victorian sewing kit made the same way and covered with velvet. They are beautiful and useful. The pattern dates back to the late 1800s.
I had never thought of making them smaller to use as thimble holders. I have a victorian sewing kit made the same way and covered with velvet. They are beautiful and useful. The pattern dates back to the late 1800s.
Great tutorial! We made a version of it and it'll be on our blog tomorrow - with a link back to you, of course. Hope yu don't mind.
Karin & Freja, pysselbolaget.se
I just discovered this tutorial via Pinterest, and I am looking forward to making a few of these for Christmas gifts this year. Thank you very much for taking the time to do the tutorial.
Your Simone looks just like my male Cooper!!!!!!!! they are identical, as soon as I can get a picture I hope to post it somewhere-lol
aka kingcooper0001@aol.com
Your Simone looks just like my male Cooper!!!!!!!! they are identical, as soon as I can get a picture I hope to post it somewhere-lol
aka kingcooper0001@aol.com
Thanks for the tutorial, this was very nice.
I love these! What great little gifts for my Hexi sewing buddies!
Thank you for this nifty tutorial!
These are gorgeous!
Thanks for the instuctions.
I'm going to have a go!
Katie
I can't wait to make one tomorrow!!!!! Thanks!
Post a Comment